
JS Exercise 7: Web Services
(Week 10, Tuesday 10/30)
A Web Service is a piece of software running on an HTTP server that allows a web client to read and/or write data that's been encoded as text using either XML or JSON. Web services are available for a wide range of information, including weather, maps and other location information, images, and videos. There are also web services that let the developer store user data online rather than in local storage, so that it is available from any computer. (One example of this is Amazon's AWS service.)
Reading and writing data to and from a database of content, whether on your own server, or on a cloud service like AWS, is a BIG topic, one which we address in more detail in downstream classes like 330 and 430. In this course we are just going to scratch the surface, and we'll only be reading data from a web service, not writing to it.
Web Services vs Web APIs vs Browser APIs
Web APIs differ from web services in that they can use any type of protocol (including local protocols like file access), not just HTTP. All web services are a type of web APIs, but not all web APIs are web services.
As an example, the browser has a significant number of APIs, which are objects and methods built into the browser that don't require an external service to function. Technically, even the DOM itself is considered an API, and that's what you're accessing when you call methods like createElement() or appendChild(). (Note: Methods that create new elements are also known as "constructors", which is how you'll see some of them referred to in this exercise.)
Retrieving and Displaying Third-Party API Data with AJAX
In order to have your web application retrieve and display data from a web service, there are several steps in the process:
- Determine what information you want to request from the API--this could be a static value (like the weather for a specific city, or the results of a GIF search for "cute cats"), or it could be a value that the user provides.
- Send the request, in the correct format, to the appropriate third-party API.
- Receive and decode the response from the API
- Display the results to the user
In step 4, you'll typically want to update the information on the page without reloading the entire page. (Think about how annoying it would be if every time you scrolled on Google Maps, the whole page reloaded!) The process of updating the content without reloading the page is known as AJAX (Asynchronous JavaScript and XML). The acronym is a bit outdated, since many web services now encode their data using JSON rather than XML, but the name has persisted. (Fun fact: the person who coined the term is the same person who created the "Elements of User Experience" model that we looked at in week 4.)
In this exercise, we're not going to be updating the retrieved data after the initial page load, so we won't have to deal with how to encode and decode requests and responses from the server. Next week, when you work on the GIF Finder application, you'll learn how to do that using JQuery.
Troubleshooting Your Code
In addition to the suggestions made in the Web Storage exercise, in this exercise you'll need to be especially careful about nesting things properly.
All of the code you add is going to go inside the navigator.geolocation.getCurrentPosition codeblock. Keep an eye on brackets and indentation to be sure you're putting things in the right places.
Using the Google Maps Javascript API
(This portion of the exercise is adapted from the MDN Third-party APIs tutorial.)
Using Browser APIs
Download the webservices.zip folder and unzip it. Open the maps_start.html file in an editor, and look at the script. In the first if statement, you'll see this line:
navigator.geolocation.getCurrentPosition(function(position) { ... }
The Navigator object uses the browser's built-in Geolocation API, which allows a page to retrieve your current location (but only if you've given permission).
After we use the Geolocation API to retrieve the user's current location, we're going to send that information to a third-party API provided by Google Maps, and request information based on it.
Using the Google Maps Javascript API
To use the Google Maps JavaSCript API, we first have to link to it in a script tag, so that we have access to the various objects and methods it provides. In the maps-start.html page, note that there's a <script> tag in the head of the document that links to https://maps.google.com/maps/api/js?key=INSERT-YOUR-API-KEY-HERE.
As you may have gathered, you're going to need to add some information to that API call--specifically, a developer key. The point of the key is to provide some accountability in who's using the API and how. If you started using the API to do malicious activities (like tracking people's location without their permission, or spamming the API with requests), Google could simply revoke your key. (Try loading the page in a browser and checking the console to see what happens if you don't have a valid key.)
Google recently switched to requiring a credit card to get your own API key. (They don't charge you for using this API, but they require a payment method associated with your account for verification purposes.) I've set up a key for use in this example, which I'll revoke at the end of the semester. If you want your examples to work after that, you'll need to get your own key by signing up on the Google Cloud Platform site.
Because I don't want my key on the open web, I've posted it to Slack. Replace INSERT-YOUR-API-KEY-HERE with that key.
Once you've added the key, load the file in a browser. Give the page permission to access your location. Assuming you're in the Rochester area when you run the page, you should see a map like this one:
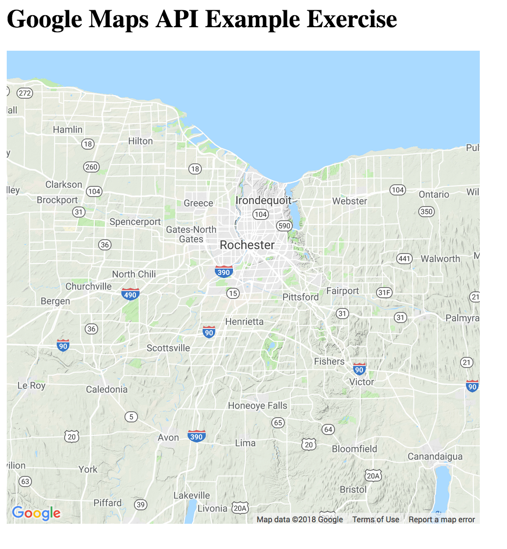
(If you don't see that map, make sure you got the key right. If you're sure it's right, now would be a good time to ask for help!)
Understanding the Google Maps Code
Take a look at the code again, so that you understand what's happening. I've added comments to the function that calls the map that break it down section by section.
This exercise will walk you through a few of the API functions, but you can view tutorials on how to use more of the API's functionality on the Google Maps JavaScript API reference site.
Adding a Map Marker
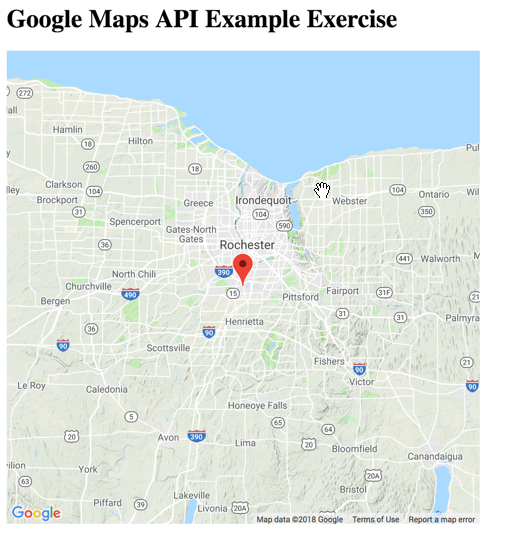
We're going to add a marker to the map, to show your current location. The Google Maps API has a constructor for markers: google.maps.Marker(). It requires you to pass in an object containing Lat/Long, as well as the map on which you want the marker. Since we've defined both of those already, you don't need to define any new objects; just add this code below the var myMap = ... line :
Reload the page; you should see a red map marker appear on or near your current location:
Creating a Custom Marker
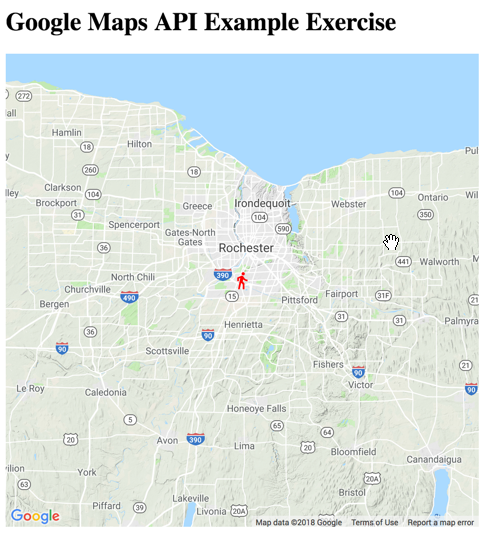
The red icon is the default Google Maps icon. To use a custom icon, we need to specify it when we create the marker. We can use a local image, or we can point to an image or icon on another site. In this example, I've downloaded the SVG for one of Google's Material Design icons, specifically the directions-walk icon.
Because this is an SVG, you can actually edit its properties if you want to. By default, the icon is black. But you could add a fill color to the second path element to make it a different color. (I did this, which is why in the image of the map below, the icon is red.)
The icon location is specified in the icon property of the options object. You're going to modify your existing marker code to include the icon reference:
var myMarker = new google.maps.Marker({
position: latlng,
icon: "baseline-directions_walk-24px.svg",
map: myMap
});
Reload the page in a browser. The map should now look like this:
Display a Pop-Up When Marker is Clicked
Another common use case for Google Maps is displaying more information about a place when its name or marker is clicked. That's what we'll do next.
First, you need to create a variable holding the content that you want in the popup. This will be placed into the popup by the API and can contain just about any content you want. Add the following line below the google.maps.Marker() constructor definition:
Next, you need to create the popup. Popups are called "info windows" in the Google Maps API, so you'll create the popoup object using the google.maps.InfoWindow() constructor. Add the following below your contentString definition, passing into it a key/value pair of content and the string you want to include (contentString). (There are other properties available for Info Windows but here we are just specifying the content.
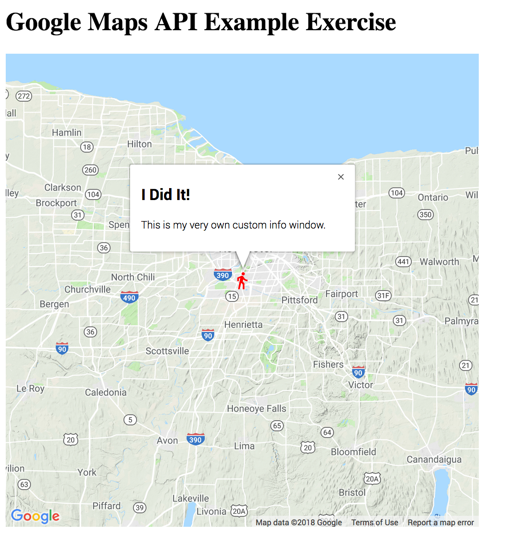
Finally, to get the popup to display when the marker is clicked, we'll add a simple click event handler. Add the following below the google.maps.InfoWindow() constructor:
Load the page up in a browser, and try clicking on your marker. Your custom popup should appear!
Deliverable
When you're done, link the file to your landing page with the name JS Web Services Exercise, and upload it no later than noon on Saturday, 11/3.